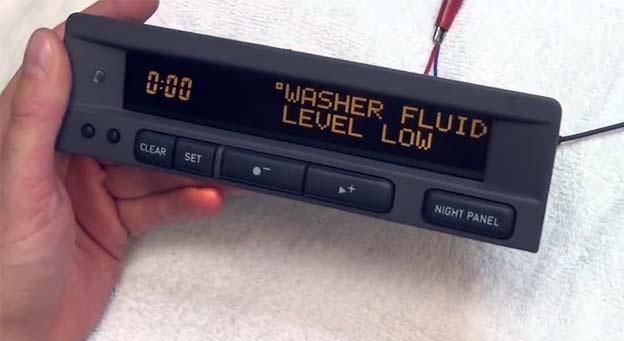
SAAB 9-3 and 9-5 models all have the very common LCD display failure on the SID and the AC unit, which ends up in missing or fading pixels on the screen.
If you have the following failures on your LCD, you are probably facing the same issue:
- Digits or complete lines of pixels have disappeared or flicker.
- Climate control unit, SID1 or SID2 displays are difficult or impossible to read.
- Dark Spots on LCD screen
- High or low temperatures effect display readout.
The pixel problem lies with the ribbon cable that connects the LCD display to the circuit board of the SID and the ACC. Dead and fading LCD pixels can be restored DIY simply replacing the faulty ribbon cable.
LCD pixel failure repair kits, ribbon cable light bulb, background light lamps are now available for DIY repairs (sold on www.germanaudiotech.net) The pictures above show the SID LCD display before and after the ribbon cable replacement. This LCD pixel failure is due to the ribbon cable, which can be done DIY.
Tools Required:
- T10 Torx Screwdriver
- 3/32 x 1-1/2 Flathead screwdriver
- Pixel Strip
- Special Soldering Iron w/ T-Tip
- Teflon Applicator for Iron
- Acetone or Isopropyl Alcohol
Step 1:
Remove T10 Torx screws from backside of SID. Put them aside.
Step 2:
Unclip back from front, gently pull rear plastic casing off. Put aside.
Step 3:
Remove T10 Torx screw from circuit board and separate board from back of faceplate.
Step 4:
Remove (2) more T10 Torx screws on circuit board from underside which is holding plastic light board onto circuit board.
Step 5:
Rip off ribbon cable and unscrew 6 bulbs using flat head screwdriver. Throw bulbs away and replace with new bulbs (twist in).
Step 6:
Use flat head screwdriver to gently scrub off adhesive left over from old cable pulled off LCD. Use acetone on LCD to gently remove Only the contact area where the new cable will be installed onto the LCD. Use acetone to remove ALL residue left over from old cable on circuit board traces.
Step 7:
Place teflon applicator onto soldering iron T head, turn on iron and let warm up fully. Should take about 2-3 minutes. The teflon may come off, unplug the iron allowing it to cool down, then putting the piece back on should fix this. Line up cable on traces of LCD, use heat to bond the cable to the glass.
Once cable is bonded to LCD, now line up traces of cable and bond to PCB contacts.
Step 8:
Reassemble device.
Here are before / after pictures of the repaired SID and ACC:


Here is a video we posted on our German Audio Tech Instagram page.

